Get your canvas data
We need two things to start using our canvas:- API Key
- The canvas ID
1
Open deploy options
First click on deploy button at the right top corner of the application interface.
This will open the deploy options.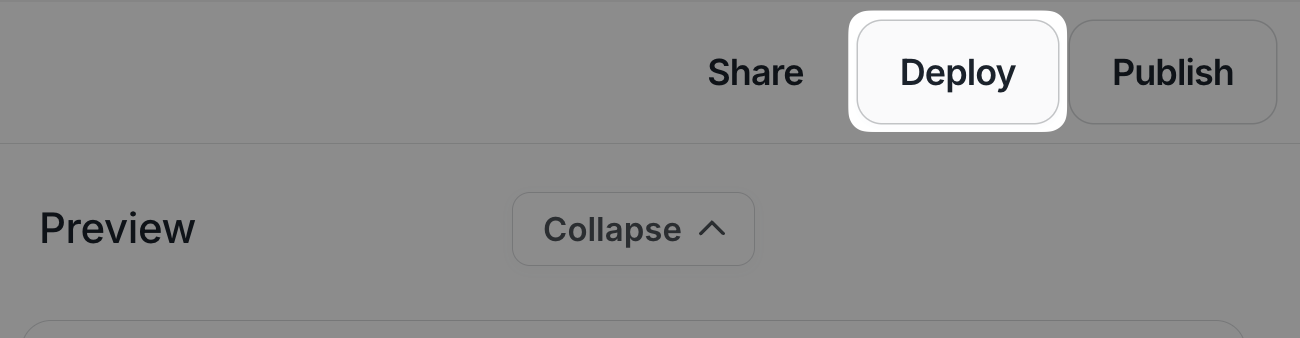
2
Open Connect via API
There you will find how to deploy apps and how to connect to the API, click on “Or connect directly via API” at the bottom of the modal.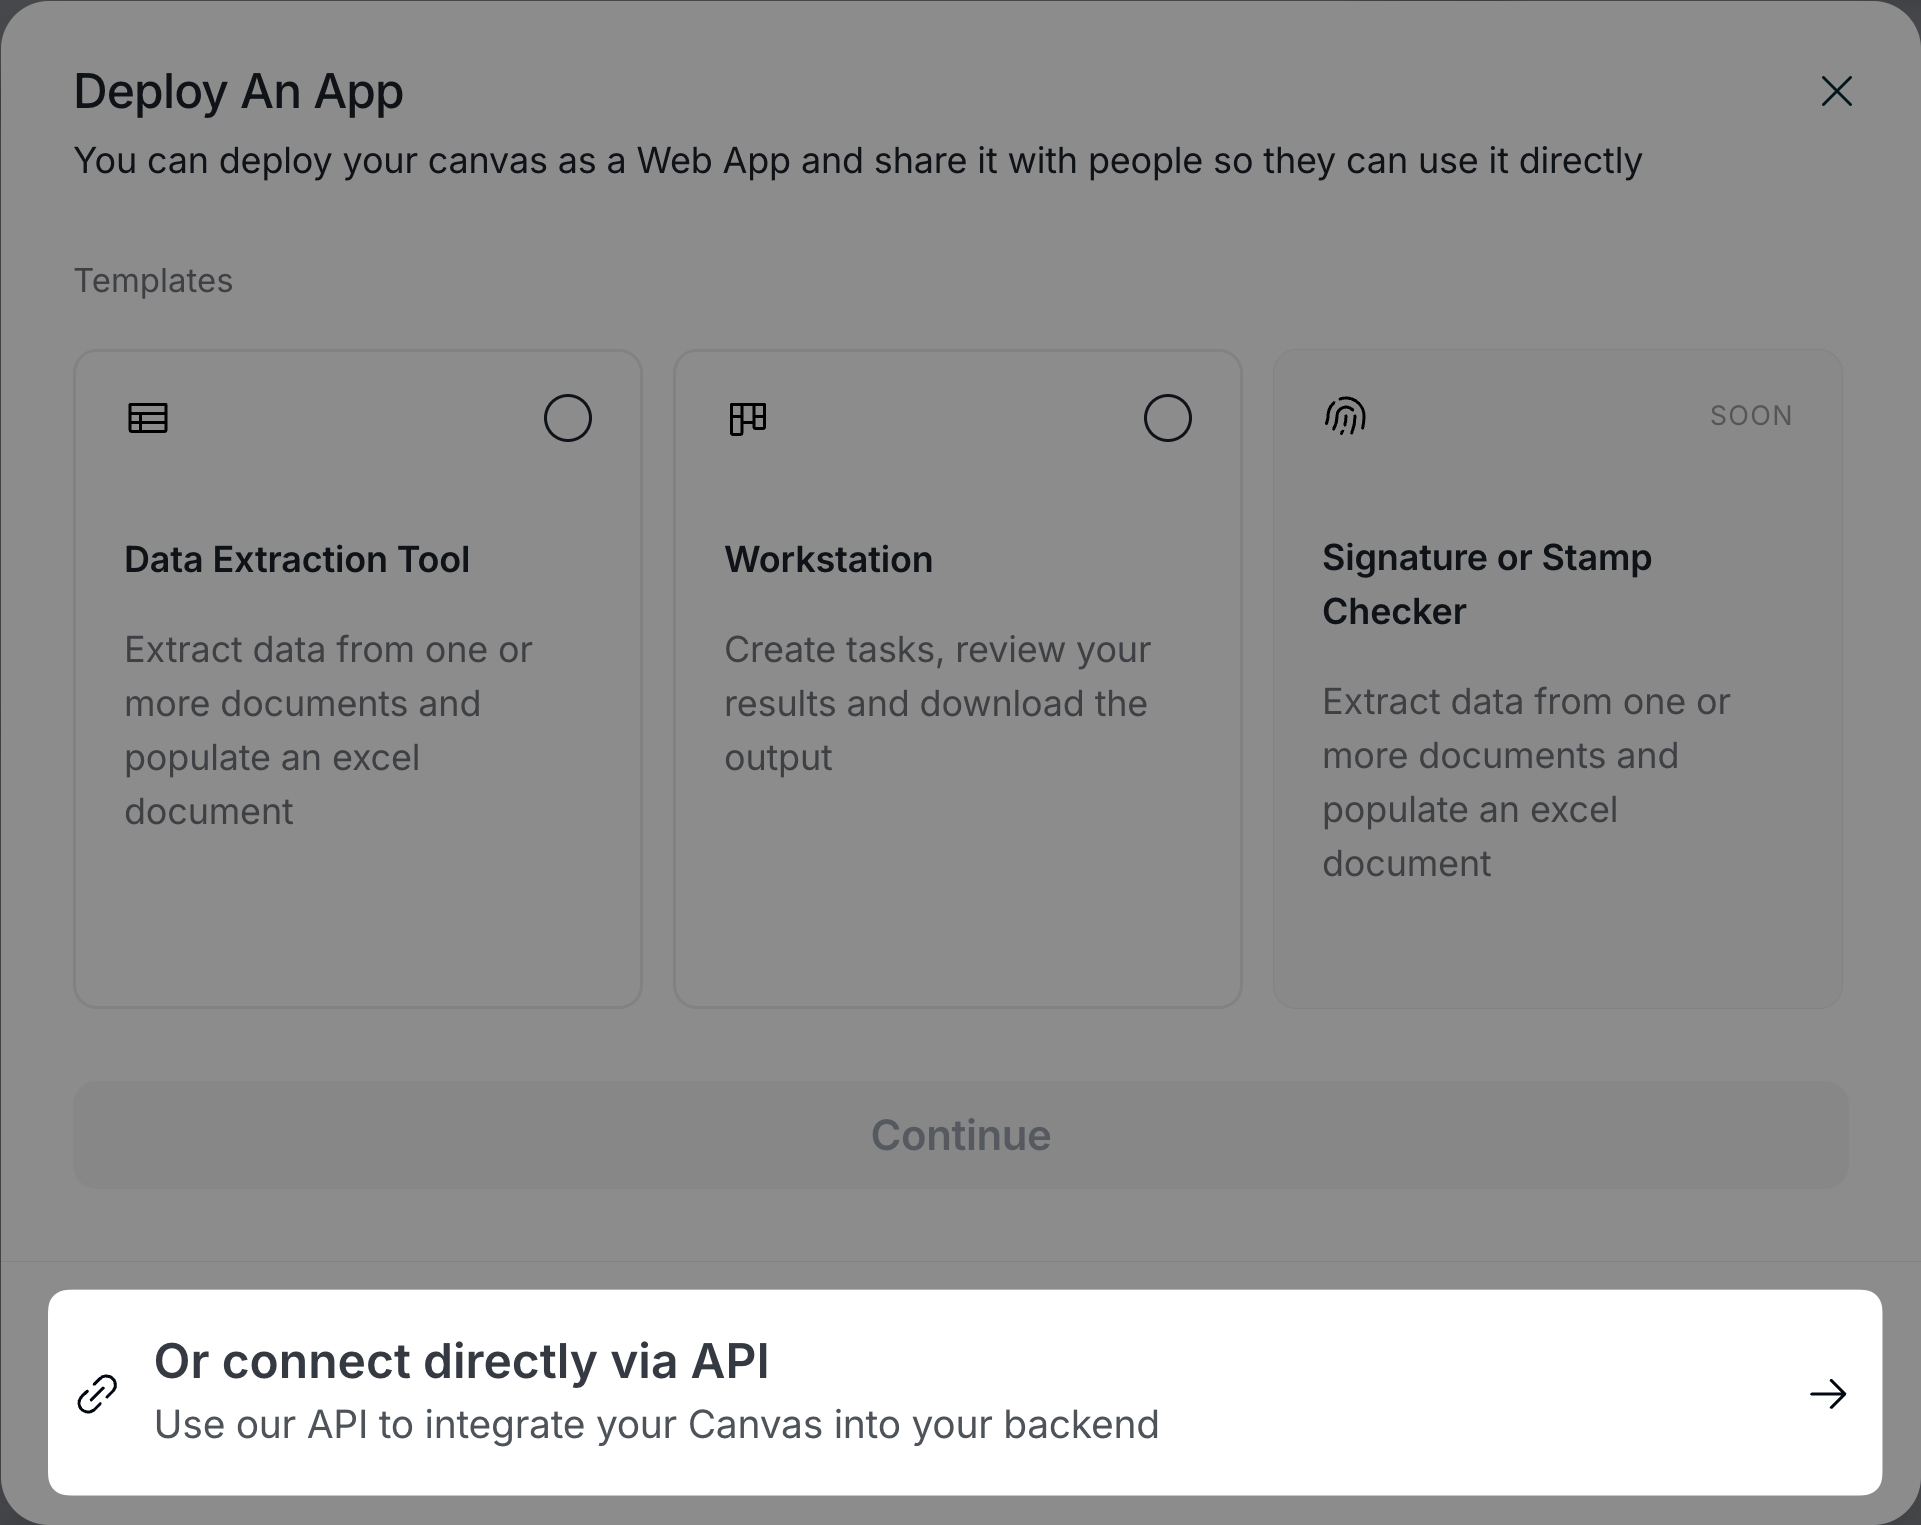
3
Get your canvas data
Here you will find all the necessary info to start integrating! Choose your preferred language to get started.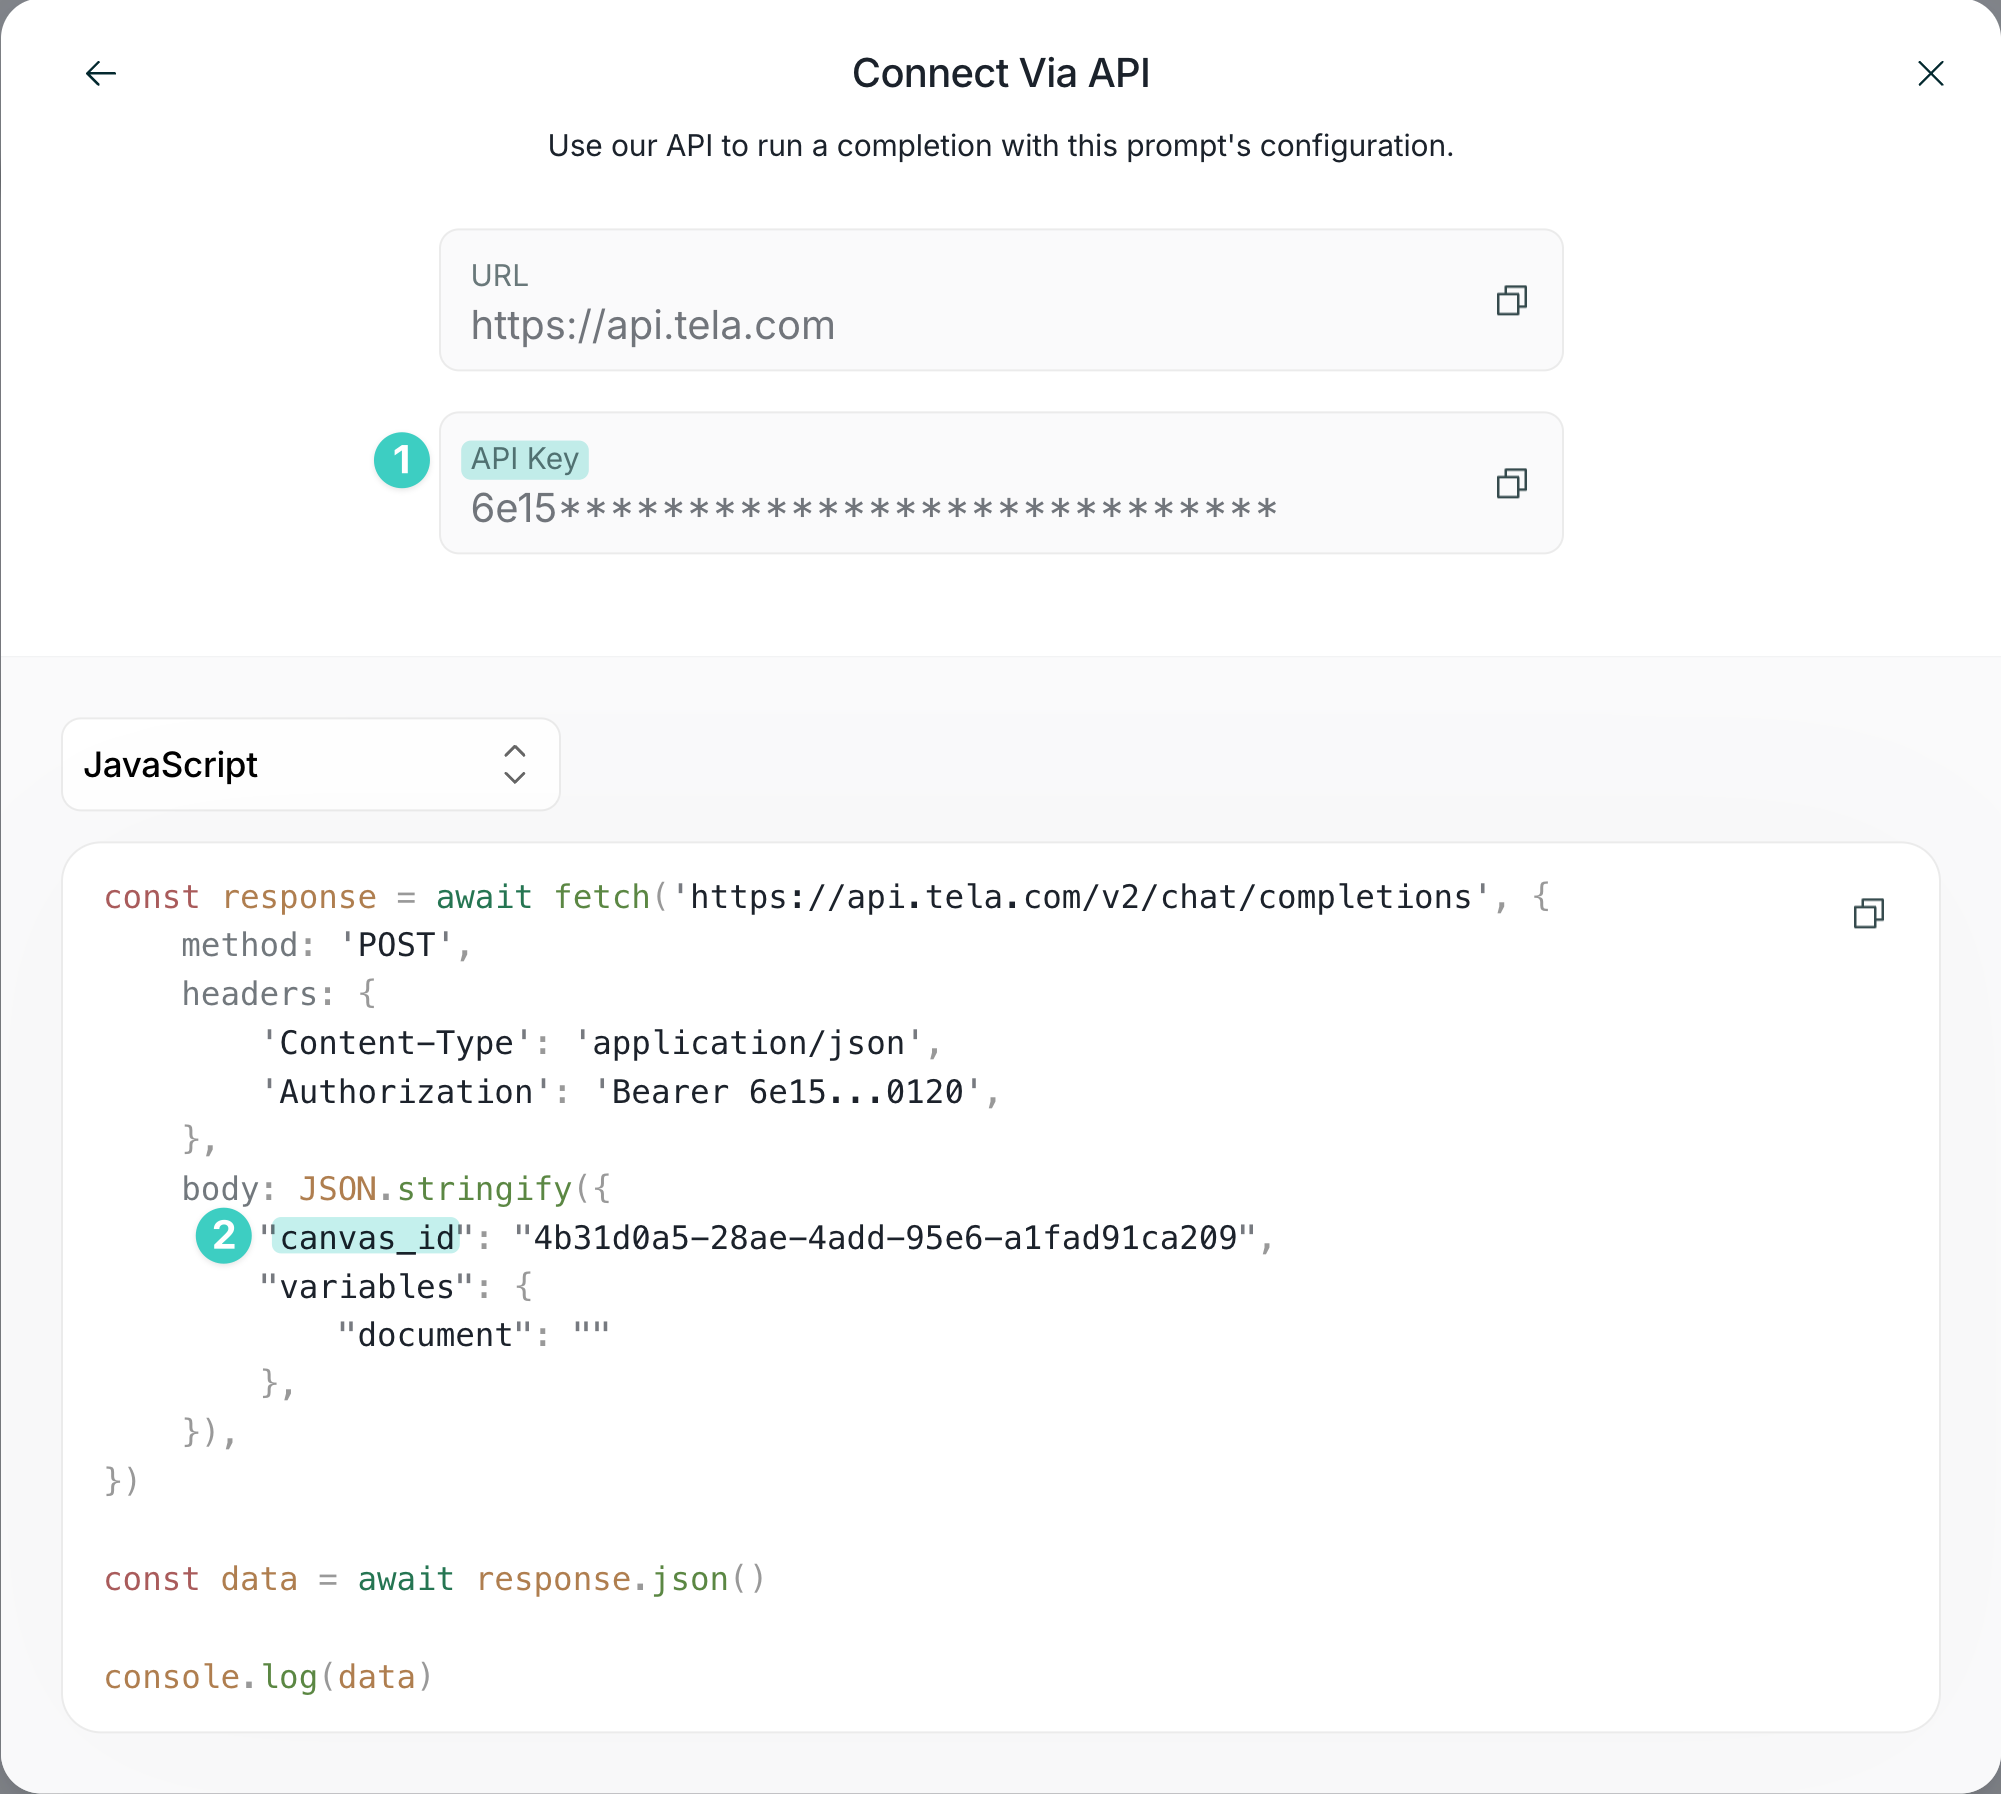
Constructing the Canvas Call Body
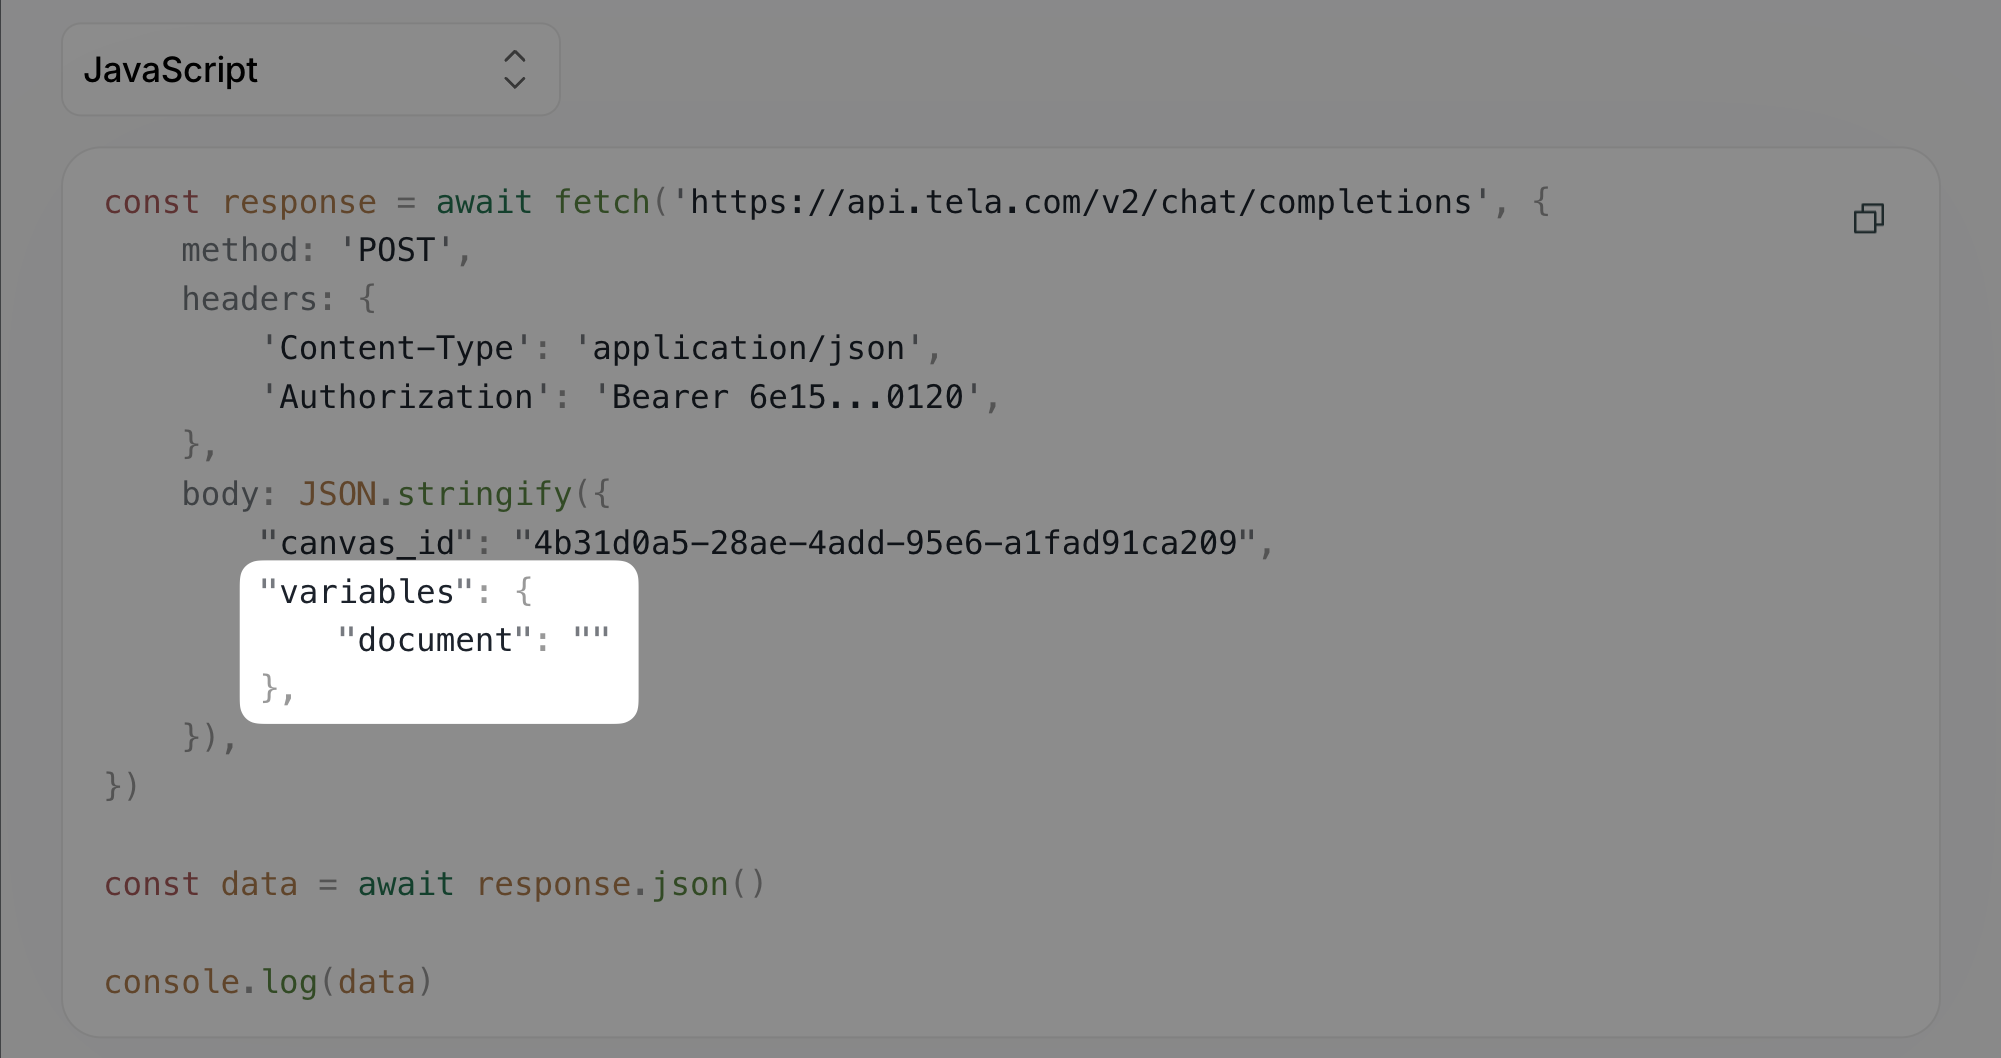
To achieve the desired behavior for your business and integration, your canvas call can include variables, historical messages, streaming, and webhook responses for asynchronous integrations.Using Variables
Variables are a key concept in prompt building with Tela. They are used to store and reuse data throughout your prompts and can be either a manual input or a file.For information on supported file formats, visit Supported files.
Using Messages
The Tela API allows you to include messages in your requests by extending the request body with themessages key.
This feature enables you to provide context or additional information to the model, enhancing the interaction and output quality.
Streaming
To enable streaming for the canvas call, simply include thestream key set to true in the request body.
Async
To achieve asynchronous behavior, you have two options:- Using the
asyncflag - Using a webhook
Using Async flag
Extending the body with anasync key set to true is the easiest way to achieve asynchronous behavior, allowing you to continue with other tasks while waiting for the completion. An id will be returned so you can monitor the status of the call.
See Get completion API Reference for how to consume the completion with the received
idUsing Webhook
You can pass a webhook URL to our API extending the body with anwebhook_url key, this will make the completion asynchronous, and you will receive the response when the completion is finished with a POST request on the URL you provided.
When the
webhook_url key is used, the call becomes asynchronous automatically, eliminating the need to include the async flag.Webhook Payload Structure
When your completion finishes, Tela will send a POST request to your webhook URL with the following structure: Headers:x-completion-run-id: The unique identifier of the completion runContent-Type:application/json
You can use the
x-completion-run-id header to correlate the webhook
response with your original request and track completion status in your
application.