

Starting from a Draft
A Workflow chains multiple steps into one automated process: extract data from a document, then route it based on a condition, then generate a report. Like a Canvas, every new Workflow starts as a Draft, private to you and outside any Project, so you can experiment before sharing it with your team. Use a Workflow when a single Canvas is not enough: when there are multiple stages, conditions, or different documents involved, and you can describe the steps in advance. If you can’t, see Agents.Workflows are enabled per Workspace. If you don’t see the Workflow option on your Dashboard, contact your Tela team.
Creating a Workflow
From your Dashboard, following the next steps will create your first Workflow:- Click Workflow
- You are redirected straight to the new Draft, created as Untitled Workflow
- Click the title at the top of the page to rename it
Understanding the Workflow page
The Workflow page has the same Craft, Test and Usage experiences as a Canvas. In Craft, the left side is where you assemble the steps and the right side is where you define the Inputs and run the Workflow.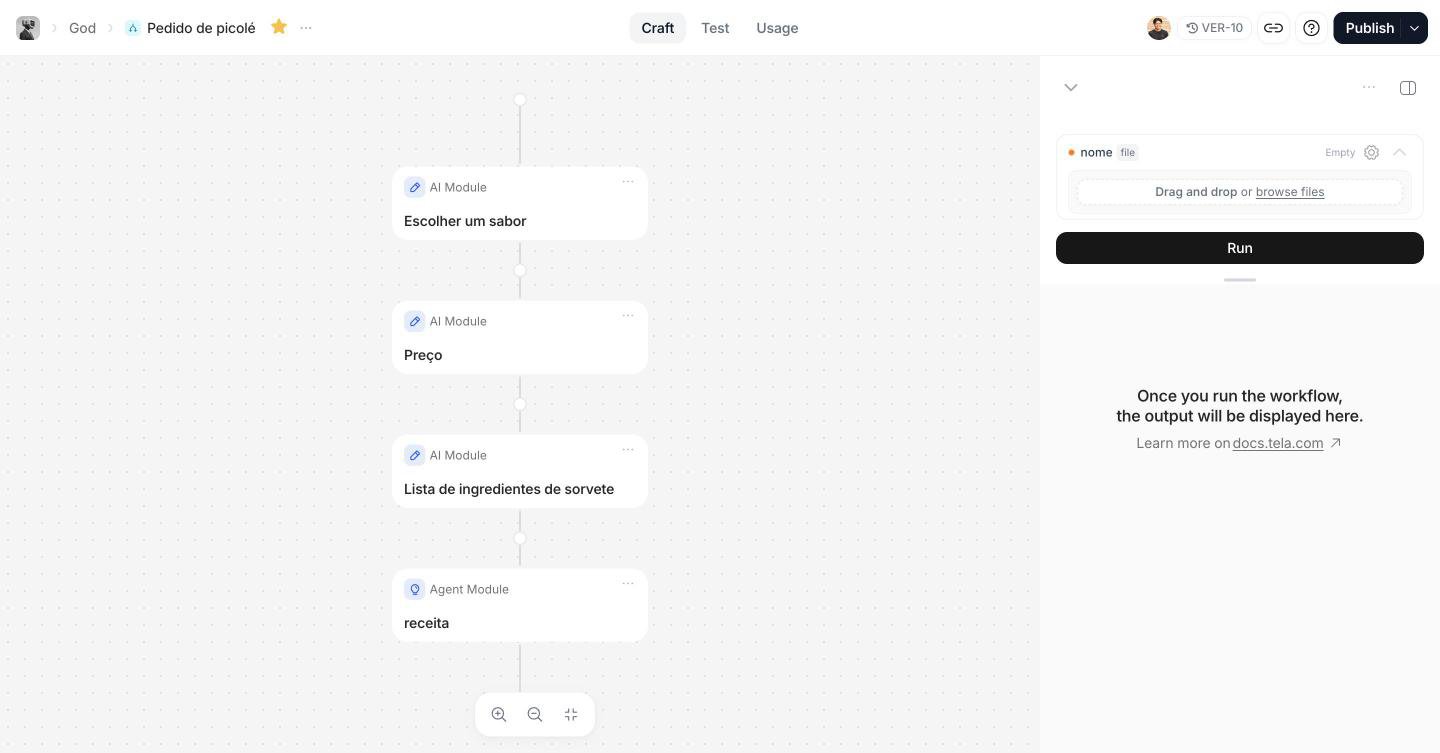
- AI Module: write a prompt and structure its output, just like a Canvas
- Existing Canvas and Existing Agent: reuse something you already built in your Workspace
- Condition: define routes so the Workflow follows different paths depending on the data
- Code Execution: run custom code on the data between steps
- Split, Crop and Map: break documents or lists into pieces and process each one
- Document Templater: generate a document from a
.docxtemplate (see How to build .docx templates)
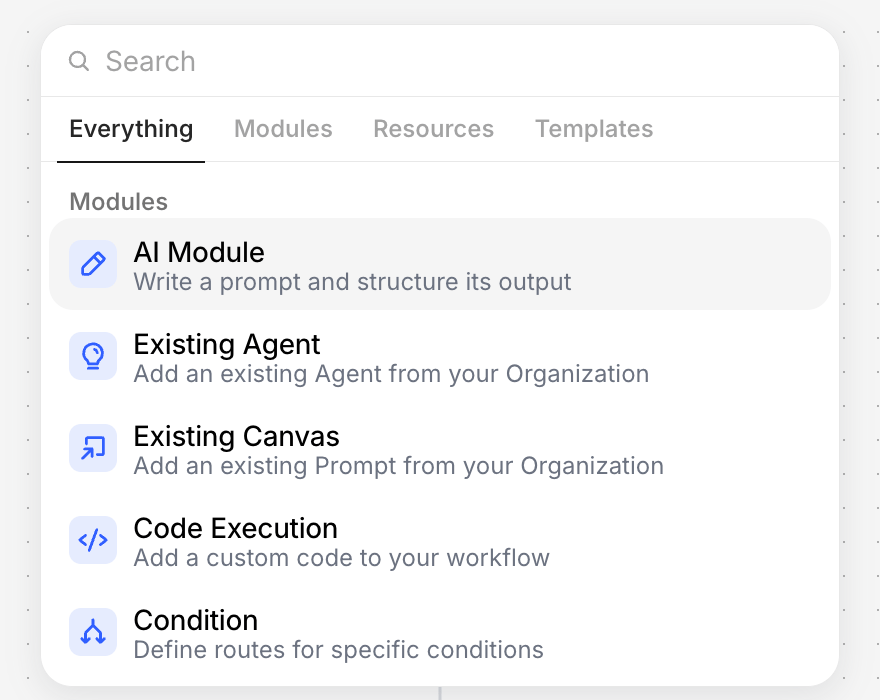
The modules available in the picker depend on what is enabled for your Workspace.
Building your Workflow
- Pick your first module from the picker and configure it. New steps are created as Untitled Step, so give each one a name
- Hover the connector below a step and click + to add the next one. Steps run in the order you add them
- In the right-hand panel, click Add Variable to define the Inputs your Workflow receives, such as a file or a text
- Inside a step, type
@to reference an Input or the output of a previous step